AUTOMATING GAUGE TYPES: BORE GAUGES
Collaborative robots with sufficient resolution and repeatability can automate measurements using standard manual bore gauges. They improve throughput, and deliver additional benefits beyond measuring inner diameters. Here’s how.
Bore Gauges and Collaborative Robots
Bore gauges are used for quality control in manufacturing to measure the inner diameter of parts – machined, molded or cast. For high repeatability, electronic bore micrometers or pistol-grip style bore gauges are preferred over telescopic or dial gauges.
With bore gauges, the measuring head is customized to the part being measured. The clearance between the measuring head and the part is very small, so inserting the gauge into the part requires manual dexterity. Automating this process requires a robot with dexterity (position resolution and repeatability) that is at least equal to a human operator.
One robot with this dexterity is the UR3e collaborative robot from Universal Robots (UR). This is the collaborative robot used in a Q-Span Gauging System.
The Ur3e robot can insert and remove parts from a bore gauge with the required precision. This allows quality teams to automate the bore gauging tasks that they are currently doing by hand. Automation improves throughput and productivity.
Automating a Bore Micrometer Measurement
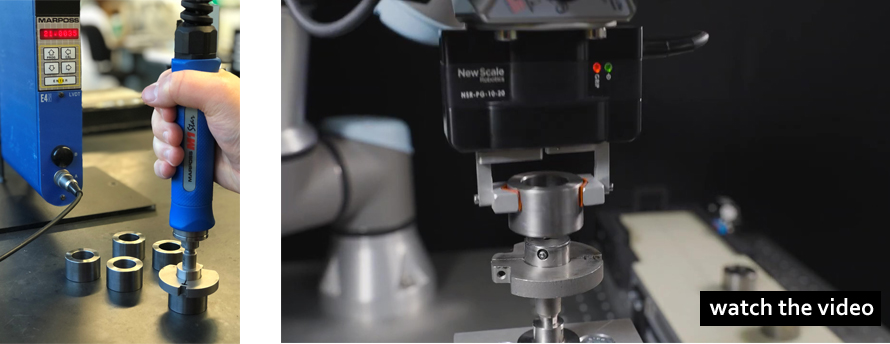
(Left) A manual bore gauge. (Right) The bore gauge incorporated into a Q-Span Gauging System. The gauge is fixed, and the robot places parts on the gauge measurement head using appropriate gripper fingers.
To use a bore micrometer with a Q-Span Gauging System, the bore micrometer is mounted in a fixed location. The robot arm brings the parts to the gauge, using gripper fingers appropriate to the part. These fingers may be standard or custom.
The robot picks a part from the input location and places the part on the measurement head. It then signals the bore gauge to release the spring (or turn the micrometer) and take the measurement. Because this approach to automation uses existing gauges, QC teams do not need to re-validate their gauges or processes.
Beyond the Bore Gauge – Measuring Recessed Features
The Q-Span Gauging System can have up to three tools on its robot arm for measuring and part handling. This presents additional opportunities to improve gauging.
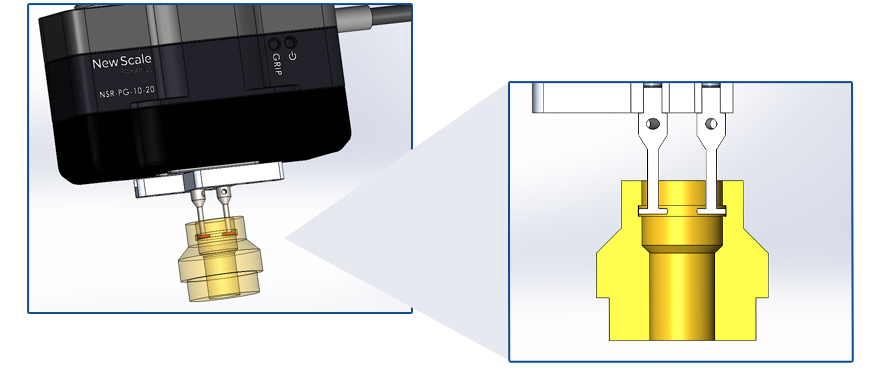
For example, recessed features inside an inner diameter are unreachable using a standard bore gauge, but can be measured using the Q-Span Gauging System. A robotic caliper can be mounted on the robot arm and fitted with appropriate probe tips, such as semi-spherical disc styli. This tool can measure the recessed feature, and automatically rotate to take multiple measurements around the inner diameter.
The robotic system can make both bore gauge and caliper measurements (and additional measurements if desired) in one sequence for each part, before placing the part in the output area. Data from the bore gauge and the robotic caliper are combined into one output file.

The gripper/caliper tool with semi-spherical disc styli can measure features that are inaccessible to a bore gauge, such as the recessed features in an inner diameter.
Automating Data Collection
An additional benefit of robotic automation is data collection. The Q-Span Data Server Application acts as a plug-and-play interface between the gauges and the robot system. Measurement data from the bore gauge – and any other gauges – is sent through the robot to a PC in ASCII format. This data can easily be exported as an Excel or a .CSV file to a quality management system (QMS) or statistical process control (SPC) software.
The system can make in-process decisions as well, for example sorting parts into go/no go bins as they are measured.
Robot Control Software: “Zero-Code Programming”
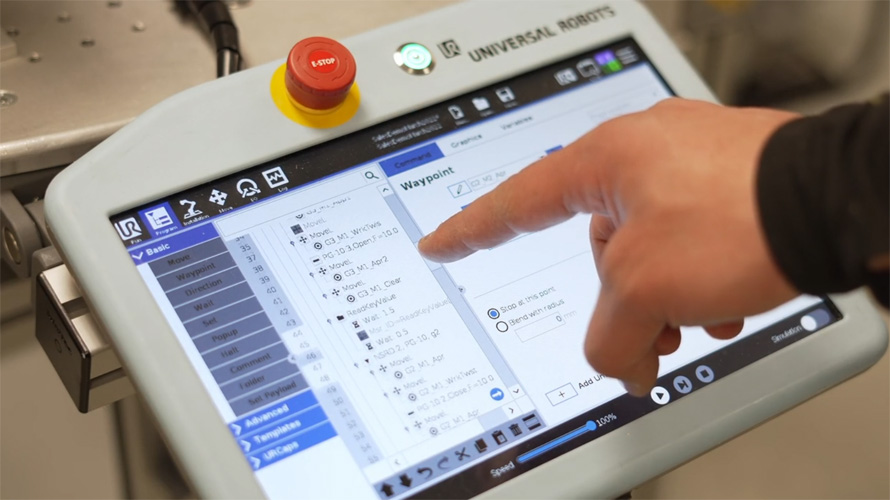
Robot control software on the UR teach pendant enables “zero-code programming.” It lets users easily build robot programs to grasp, move and measure parts, with no prior robotic experience. Only minimal training is required.
Using a different measurement head on the bore gauge is a simple matter of providing new parameters to the robot. This input can even be in the form of a spreadsheet.

Use the NSR Devices Application to build robot control programs for part handling, measurement and data collection.
Why Automate Bore Gauge Measurements?
Collaborative robots make it simple to automate measurements currently taken manually with bore gauges. Automating this repetitive task improves throughput and allows QC teams to increase the percentage of parts inspected, despite ongoing labor shortages.

Stefan Friedrich has been helping manufacturers deploy and use precision micro-mechatronic products and collaborative robots since 2016. He is currently marketing manager for New Scale Robotics and New Scale Technologies.


